Local Airflow 설치하기
예전에는 실행하고자 하는 job들을 crontab으로만 구성하였으나, 이제는 rundeck, oozie, airflow 등 많은 툴들이 사용되고 있다. 이와 같은 툴들은 각 job들의 실행 순서를 정의하고, 언제 실행될지, 실행시간이 얼마나 걸리는지 등에 대한 정보도 제공하기 때문에 유지보수나 관리, 성능개선 트래킹 관점에서도 crontab과는 비교할 수 없을만큼 유용하다.
Airflow Local 설치 (OSX)
AirFlow의 공식 사이트는 https://airflow.apache.org/ 이다. 다른 어떤 문서보다 공식사이트내 설치, 설정 활용 등에 대한 가이드를 먼저 참고하는 것이 좋다.
pip로 airflow를 설치할 것이므로, 다음과 같이 pip를 설치한다.
예전 방식)
sudo easy_install pip
설치시 문제가 발생하여, pip를 하위 버전으로 다운그레이드하고,
pip install --pip==9.0.3
pip install airflow
와 같이 설치를 진행하였다. (당시 별 문제 없었음)
최근 방식)
그런데, 2018/12/04 기준으로 위와 같이 진행하니 다른 에러가 발생하여, 아래와 같이 변경 설치하였다. 설치 환경에 따라 다를 수 있으므로, 에러가 나는 경우에만 관련 내용을 참고하면 될 듯 하다.
sudo pip install apache-airflow
만약, 다음과 같은 에러가 뜬다면
File "/private/tmp/pip-build-pq6f_5/apache-airflow/setup.py", line 49, in verify_gpl_dependency

 raise RuntimeError("By default one of Airflow's dependencies installs a GPL "

 RuntimeError: By default one of Airflow's dependencies installs a GPL dependency (unidecode). To avoid this dependency set SLUGIFY_USES_TEXT_UNIDECODE=yes in your environment when you install or upgrade Airflow. To force installing the GPL version set AIRFLOW_GPL_UNIDECODE
맨 마지막 줄에 뜨는 메시지를 반영하여, 다음과 같이 실행한다.
sudo SLUGIFY_USES_TEXT_UNIDECODE=yes pip install apache-airflow
또, 만약 dateutil과 관련하여 다음과 같은 에러가 뜬다면, (예전엔 못봤던 에러)
 Found existing installation: python-dateutil 1.5
    Uninstalling python-dateutil-1.5:
Could not install packages due to an EnvironmentError:
최종적으로 다음과 같이 실행하여 airflow 설치를 완료하였다.
sudo SLUGIFY_USES_TEXT_UNIDECODE=yes pip install apache-airflow --ignore-installed python-dateutil
Airflow 설정 DB 초기화
설치 후, 1회만 해주면 되는 job으로 airflow가 내부 참조하는 sqlite db 초기화 작업이 있다.
airflow initdb
Airflow Web Server 실행
airflow webserver -p {포트}
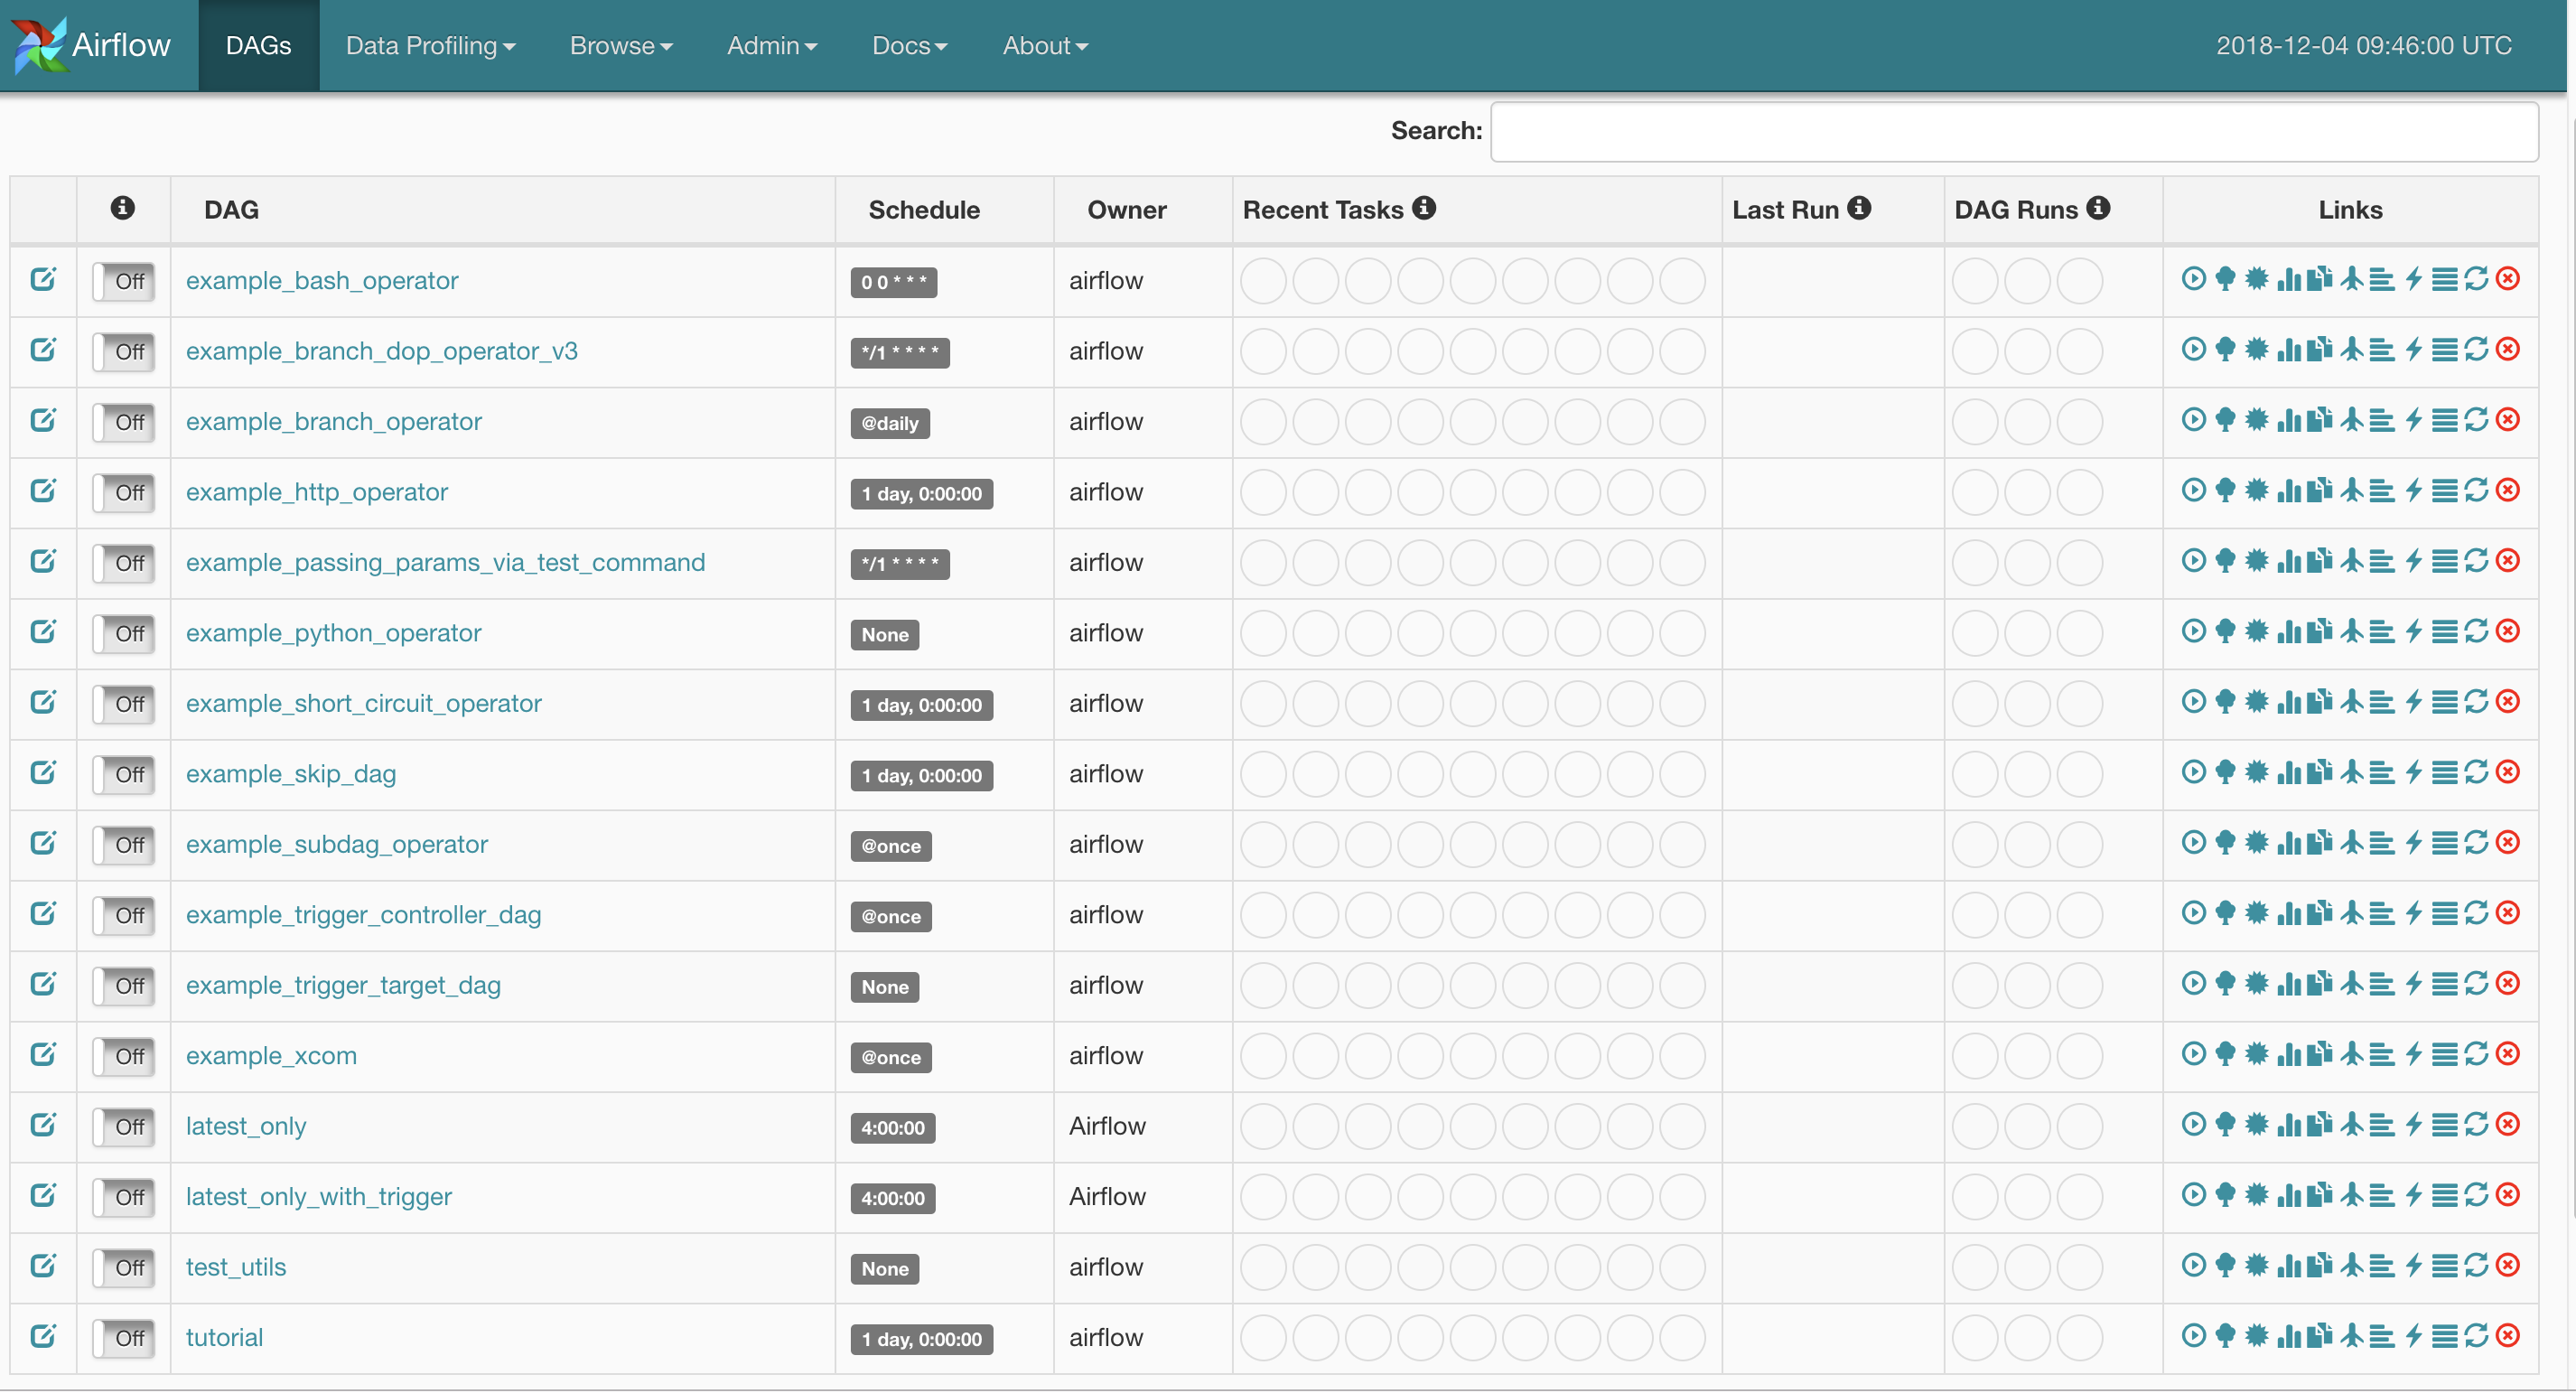
웹 서버를 띄우면, 위와 같이 여러 샘플 workflow들이 포함되어 있다.
Example
제일 위의 example_bash_operator를 살펴보면, 세부 내역을 확인할 수 있다.
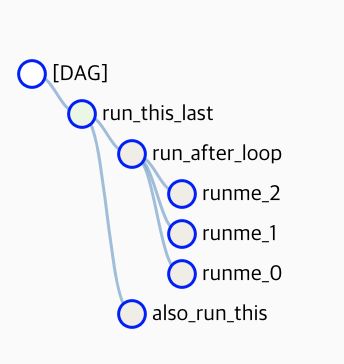
각 job의 실행 순서가 다소 헷갈릴 수 있는데, leaf 부터 root로 올라가는 실행 구조이다. 이는 graph view에서 보면 좀더 직관적으로 표현된다. (화살표가 보여서)
DAG(Directed Acyclic Graph)는 말 그대로, 방향성이 있으면서 사이클이 없는 그래프 즉, 일방통행 그래프라 할 수 있다. 임의의 노드를 클릭하면, context menu가 뜨는데 해당 노드별 세부 내용 조회 및 지시를 할 수 있다.
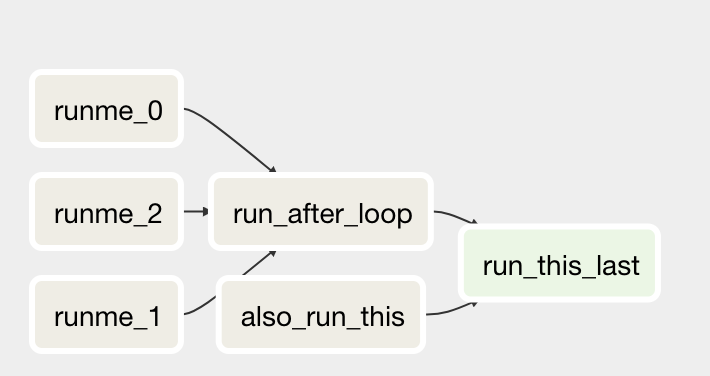
상단의 코드 탭을 클릭하면, 이 DAG의 소스를 볼 수 있다.
# -*- coding: utf-8 -*-
#
# Licensed to the Apache Software Foundation (ASF) under one
# or more contributor license agreements.  See the NOTICE file
# distributed with this work for additional information
# regarding copyright ownership.  The ASF licenses this file
# to you under the Apache License, Version 2.0 (the
# "License"); you may not use this file except in compliance
# with the License.  You may obtain a copy of the License at
#
#   http://www.apache.org/licenses/LICENSE-2.0
#
# Unless required by applicable law or agreed to in writing,
# software distributed under the License is distributed on an
# "AS IS" BASIS, WITHOUT WARRANTIES OR CONDITIONS OF ANY
# KIND, either express or implied.  See the License for the
# specific language governing permissions and limitations
# under the License.

from builtins import range
from datetime import timedelta

import airflow
from airflow.models import DAG
from airflow.operators.bash_operator import BashOperator
from airflow.operators.dummy_operator import DummyOperator

args = {
    'owner': 'airflow',
    'start_date': airflow.utils.dates.days_ago(2),
}

dag = DAG(
    dag_id='example_bash_operator',
    default_args=args,
    schedule_interval='0 0 * * *',
    dagrun_timeout=timedelta(minutes=60),
)

run_this_last = DummyOperator(
    task_id='run_this_last',
    dag=dag,
)

# [START howto_operator_bash]
run_this = BashOperator(
    task_id='run_after_loop',
    bash_command='echo 1',
    dag=dag,
)
# [END howto_operator_bash]

run_this >> run_this_last

for i in range(3):
    task = BashOperator(
        task_id='runme_' + str(i),
        bash_command='echo "" && sleep 1',
        dag=dag,
    )
    task >> run_this

# [START howto_operator_bash_template]
also_run_this = BashOperator(
    task_id='also_run_this',
    bash_command='echo "run_id= | dag_run="',
    dag=dag,
)
# [END howto_operator_bash_template]
also_run_this >> run_this_last

if __name__ == "__main__":
    dag.cli()
Workflow 실행순서 지정
위의 tree view 또는 graph view에 표현된 바와 같이, job의 실행 순서를 지정하는 부분이 task » run_this와 같이 표기된 부분이다.
Airflow 공식 가이드에도 소개된 바와 같이 두 가지의 표현방식을 사용할 수 있다.
1. using set_upstream(), set_downstream() methods
op1.set_downstream(op2)
op2.set_downstream(op3)
op3.set_upstream(op4)
2. using bitwise operators
op1 >> op2 >> op3 << op4
두 표현식 모두 실행순서는 동일하다. op1을 먼저 실행하고, op2, op3의 순서대로 실행된다.
Scheduler 실행
DAG의 실행주기를 설정한 후, scheduler daemon을 띄워서 주기적으로 실행되도록 한다.
airflow scheduler
Leave a Comment